NoteGitlab Enterprise is only supported on env zero Organizations signed up for our Self-Hosted Agent.
Initial GitLab Enterprise Setup
For env zero to be able to clone your code and post back commit statuses when running Plan on Pull Request you need to provide it with an access token with write permissions. This only needs to be done once for your Organization.- Create a Personal access token on your GitLab Enterprise.
- We recommend creating the token for a bot user - as that is the user that will post back commit statuses and comments.
- The user must have access to each repository you would like to be able to use with env zero. For each project, the user should have at least Maintainer/Owner permissions.
- The token must have the “read_repository” and “api” scopes defined.
- Encode the personal access token in base64, and use it in the K8S agent installation process as a helm value -
gitlabEnterpriseCredentialsEncoded. Check out our Self-Hosted K8S agent docs for more information. - Install/update the agent with the new value
Webhooks Integration
Adding Webhooks is required to support Continuous Deployment and our Plan on Pull Request features on Gitlab Enterprise.- Open your repository page in GitLab Enterprise.
- Click on the settings icon.
- Enter the Webhooks page.
- Copy and paste the URL and Secret values from the env0 Template creation page.
- Navigate to env zero > Organization Settings > VCS tab.
- Find your Gitlab Self-Hosted connection, and click the pencil icon.
- In the modal that pops up, click on ‘“Webhook Settings”.
- A new modal will pop up that contains the Webhook URL and Webhook Secret.
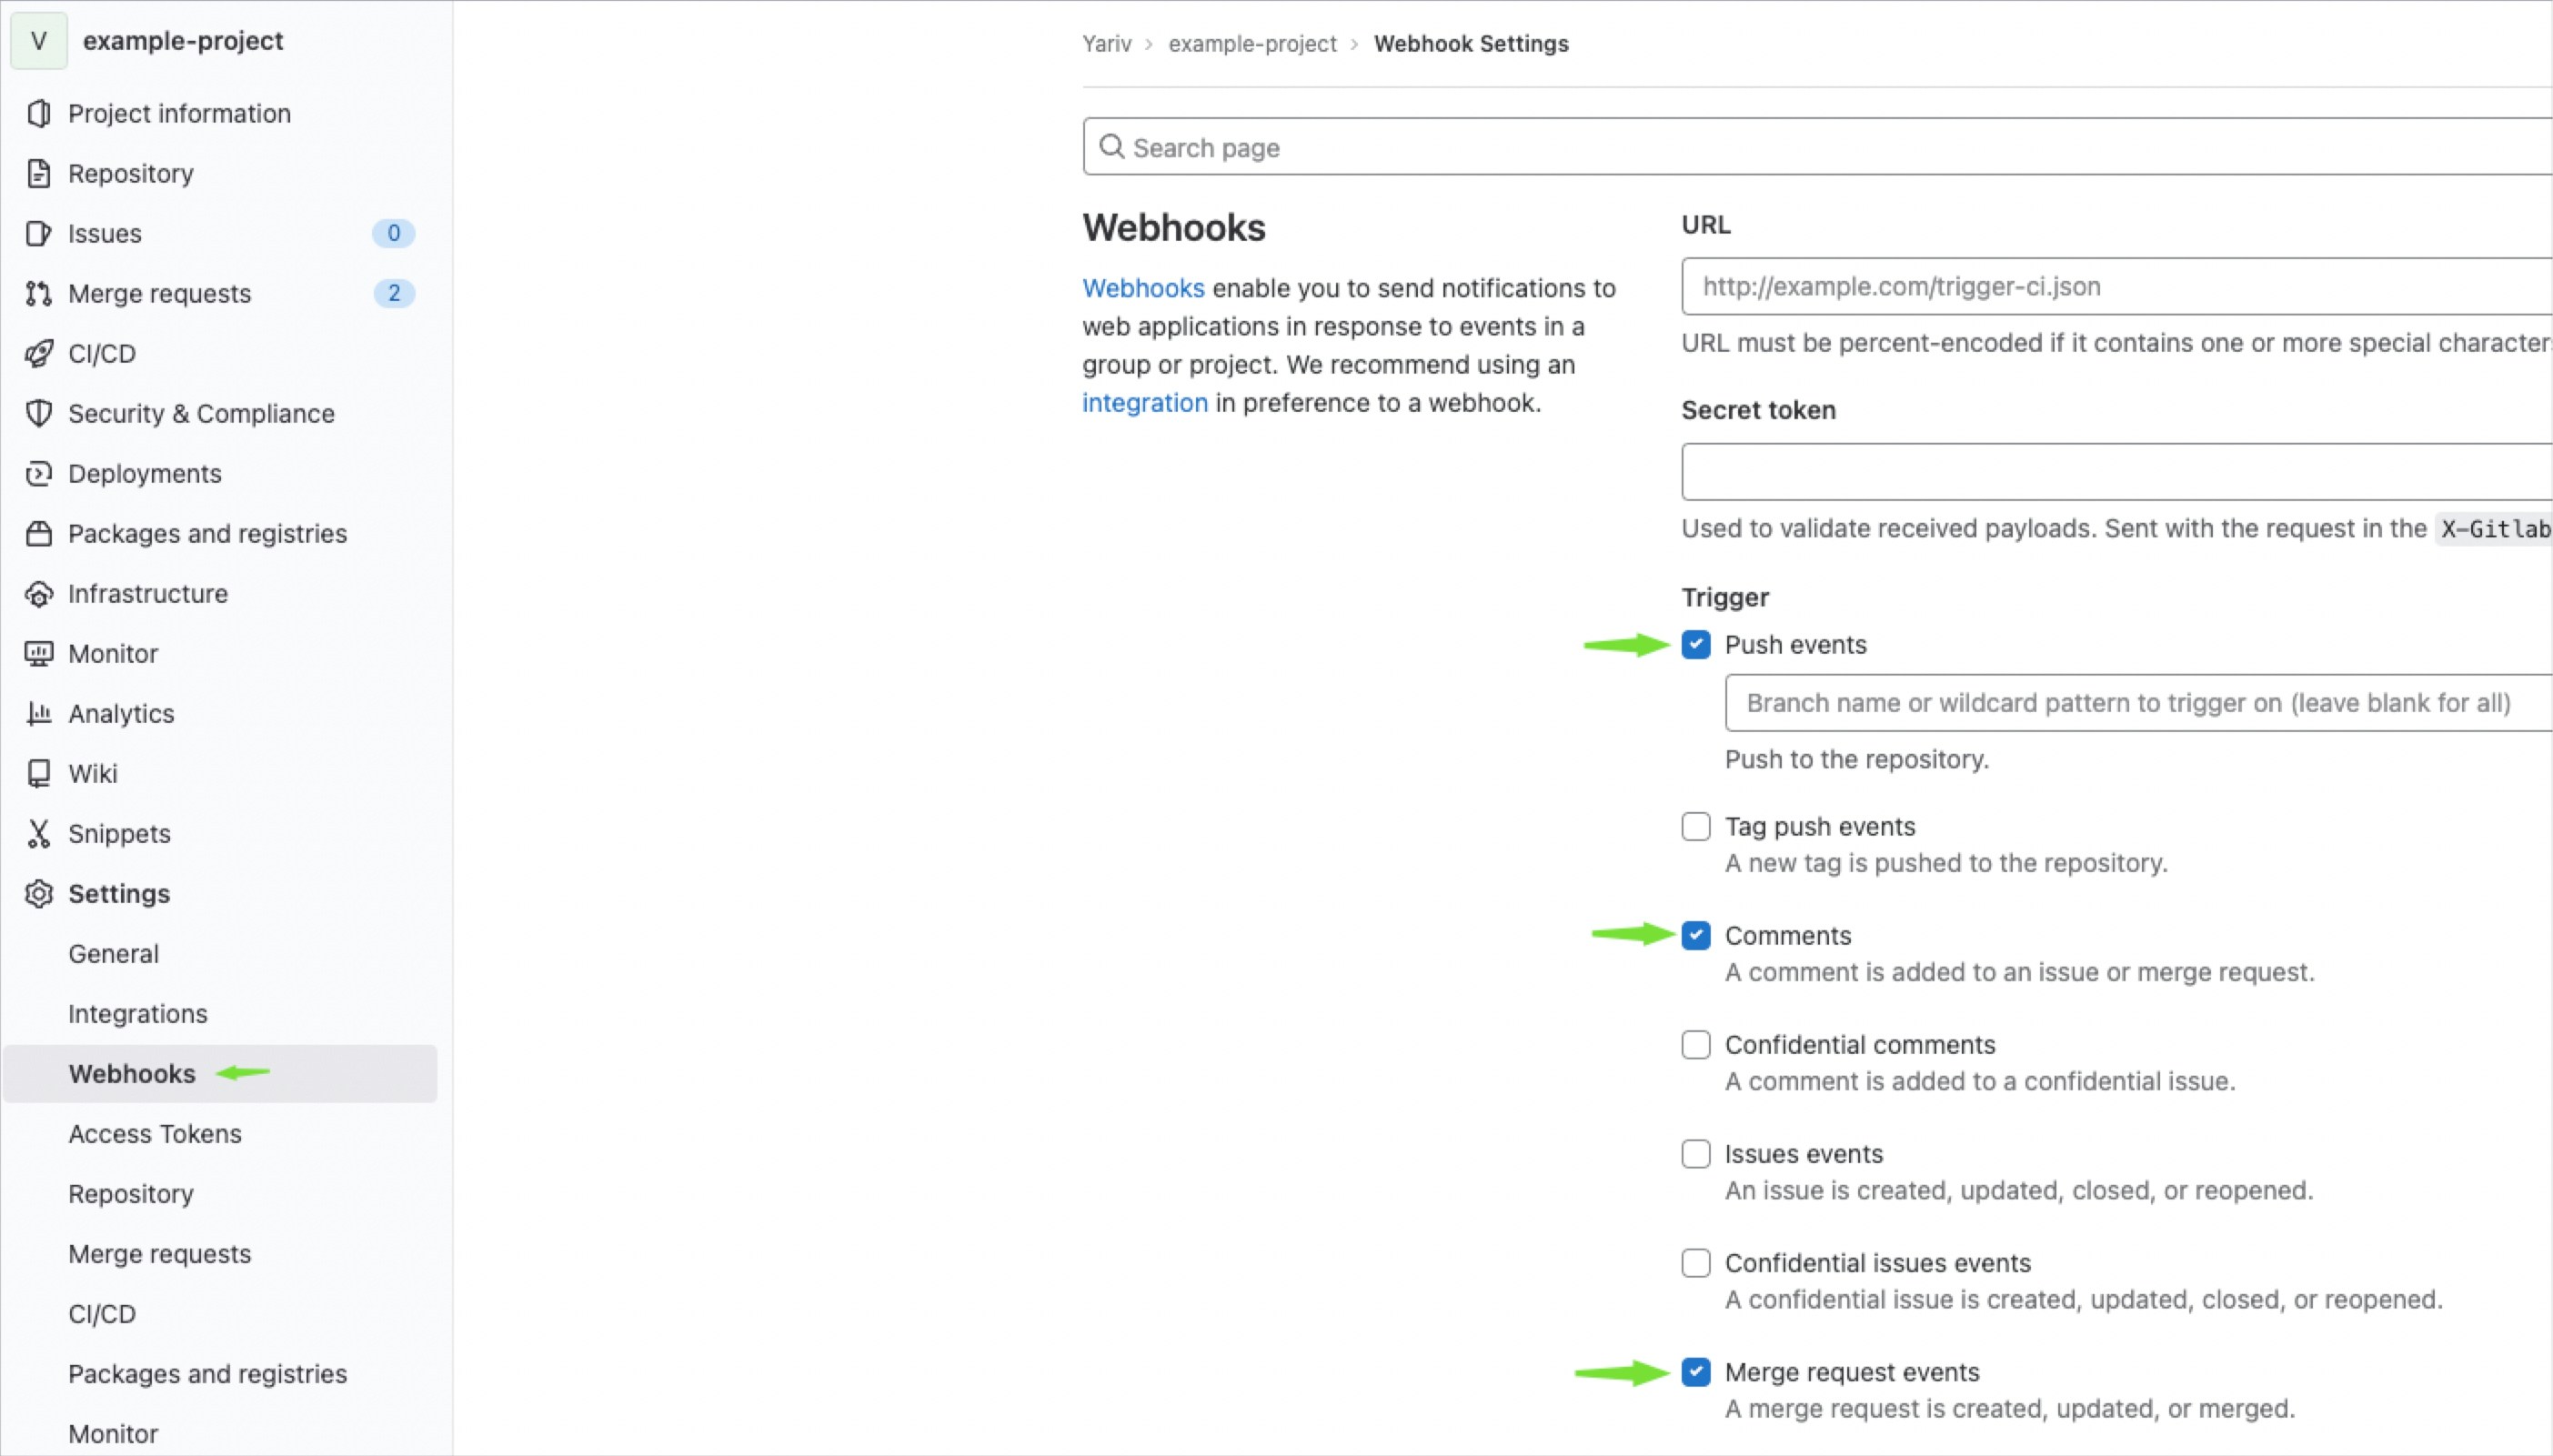
- Check the “Push events”, “Merge request events” and “Comments” events.
- Click on the “Add webhook” button.
Next steps
- Standard Gitlab Integration - Connect cloud-hosted GitLab repositories.
- Managing VCS - Manage all VCS provider connections in one place.
- Self-Hosted Kubernetes Agent - Deploy the agent required for self-hosted VCS.