

Overview
This guide will show you how to create a GCP Workload Identity Federation Provider, and attach it to a Service Account to generate temporary credentials by accepting env zero’s OIDC token. Refer to env zero’s OIDC configuration.This guide configures a v2 OIDC credential (the recommended format), where the token audience is
api://env0-gcp. See Token versions for background. If you already authenticate to GCP with a v1 credential (allowed audience set to https://prod.env0.com), see Migrating an existing v1 credential below.Workload Identity Federation Pool and Provider
- Login to your GCP account and select the relevant project.
- In the left-hand side menu select
IAM & Admin - Go to
Workload Identity Federationpage - Click on the
Create Poolbutton - Enter a name and description, make sure the
Enabled Poolis selected and click on theContinuebutton.
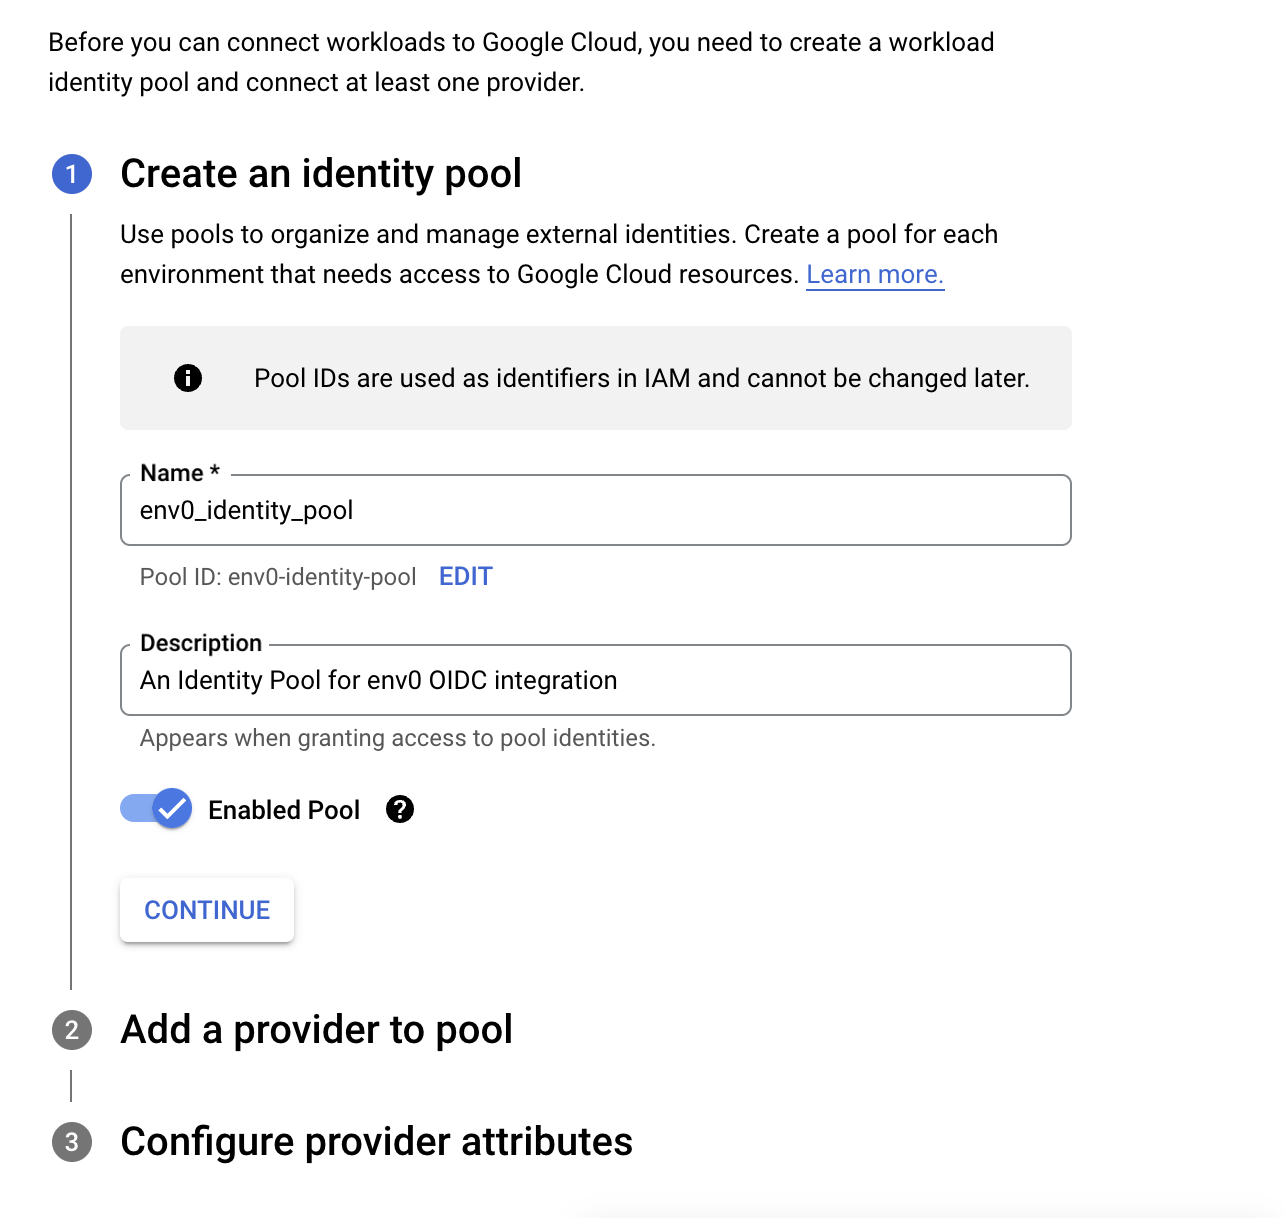
Identity Pool
- In
Select a providerselection choose OIDC, add a Provider name, enter a Proivder ID - In the
Issuer (URL)section enterhttps://login.app.env0.com/ - In the
AudiencesSelectAllowed audiencesand enterapi://env0-gcpand click on the continue button.
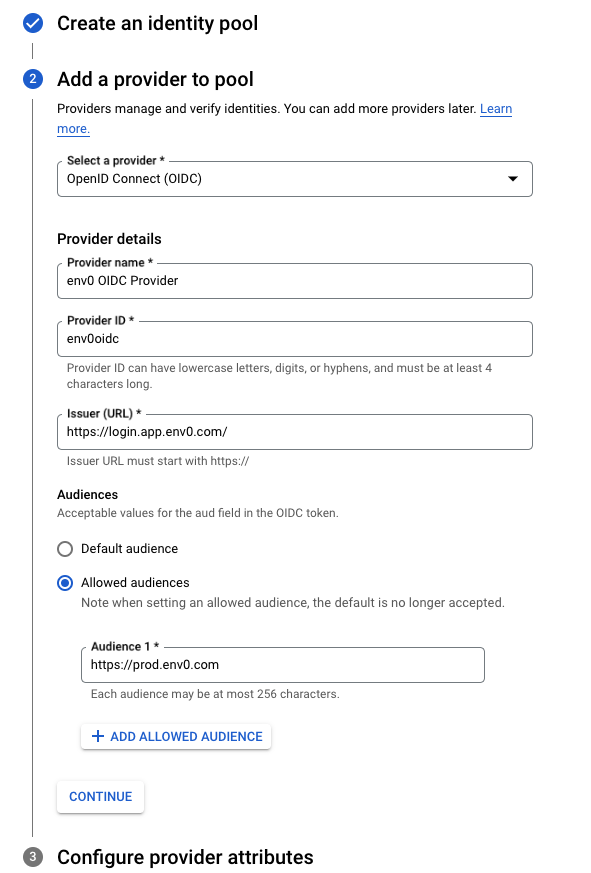
Identity Provider
- In the
Configure provider attributesunder theOIDC 1enterassertion.sub - Click on the
Savebutton
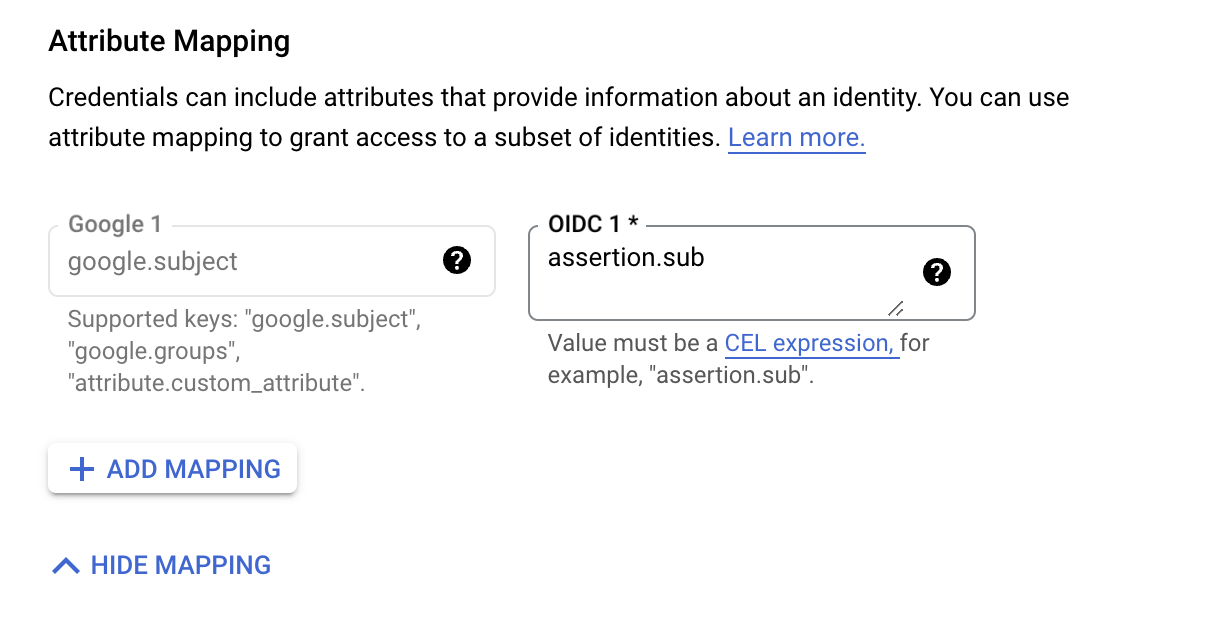
Attribute Mapping
Adding Custom ClaimsIf you like to add more Custom Claims, for example, I would like to add the organization id claim I would click on the
Add Mapping button and add attribute.org_id in the Google text box, and in the OIDC I would add assertion.organizationId, and repeat step 14 with the organization id.Read more about Custom Claims here- Follow this guide to get your
subvalue - In the Identity pool you’ve just created click on the
Grant Accessbutton - In the
Service accountselect the relevant service account you would like to associate the identity pool with. Make sure this service account has the relevant access to what your code needs to create those resources - Select the
Only identities matching the filterradio button and in theAttribute nameselectsubjectand in theAttribute valueenter the value of yoursubyou got from the previous steps, and click on theSavebutton
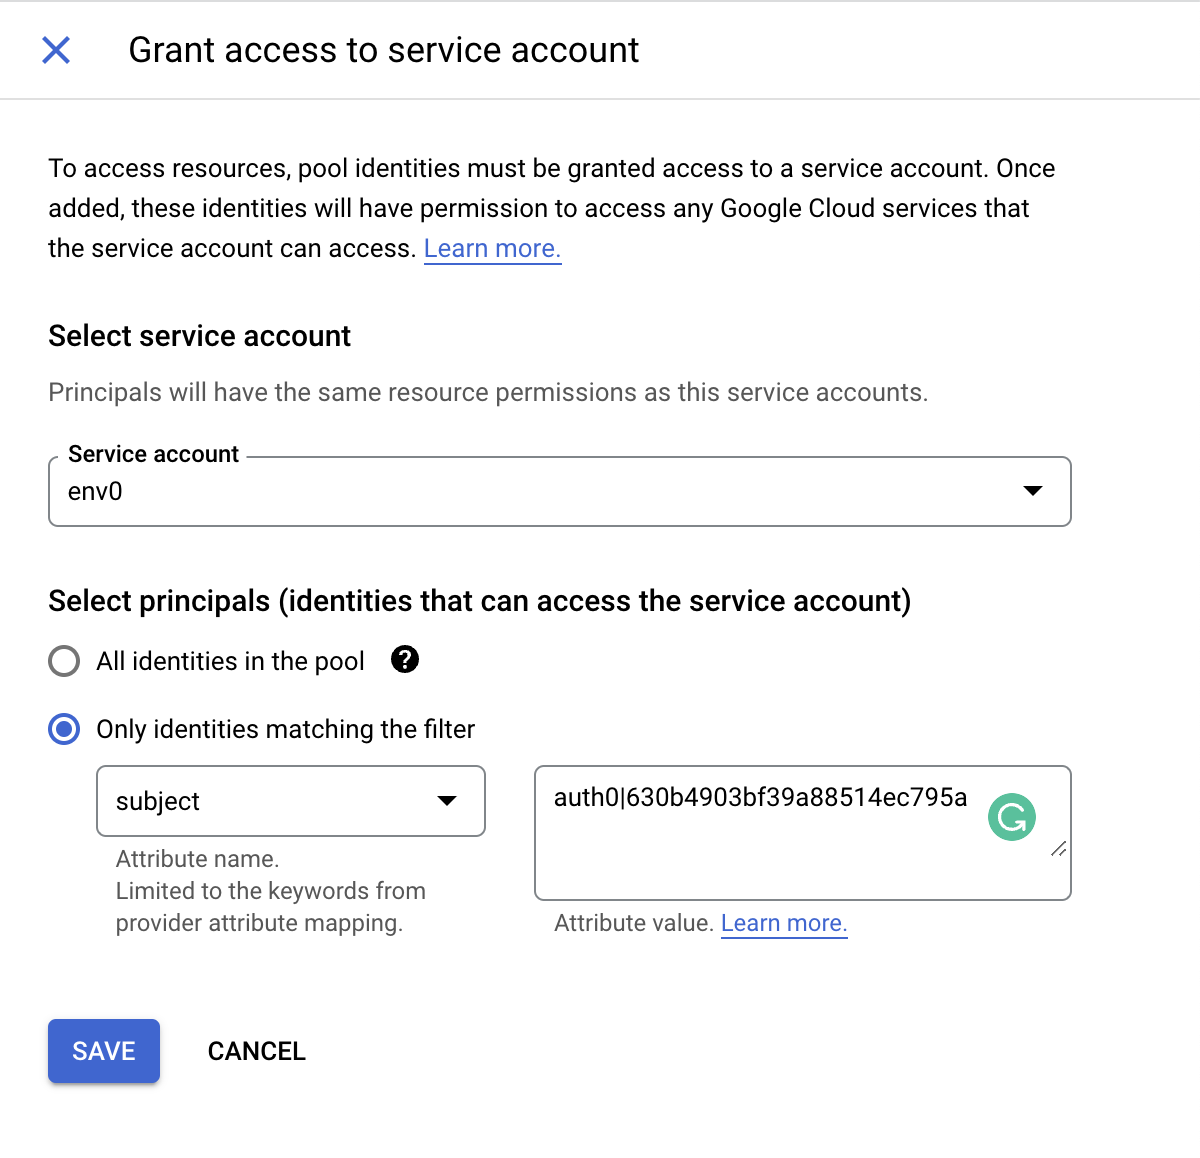
Grant Access to Service Account
- In the
Configure your applicationmodal select the env zero provider you have created, insertenv0-oidc-token.txtas a filename inOIDC ID token pathtext box , and in theFormat typeselecttextand click on theDownload Configbutton - This will download a JSON configuration file that we will need during your deployment in env zero, and doesn’t contain any sensitive data on it:
Configure env0 OIDC Credential
Go to the organization’s credentials page and create a new deployment credential. SelectGCP OIDC type and enter the following fields:
JSON configuration file content- The content of the JSON configuration file from the previous step- Use v2 OIDC token - check this box so env zero mints a token with the
api://env0-gcpaudience added to the provider’s allowed audiences above. The form shows the resultingAudience (aud)value. Leaving it unchecked produces a v1 token (aud: https://prod.env0.com), which the provider will reject unless that audience is also allowed.
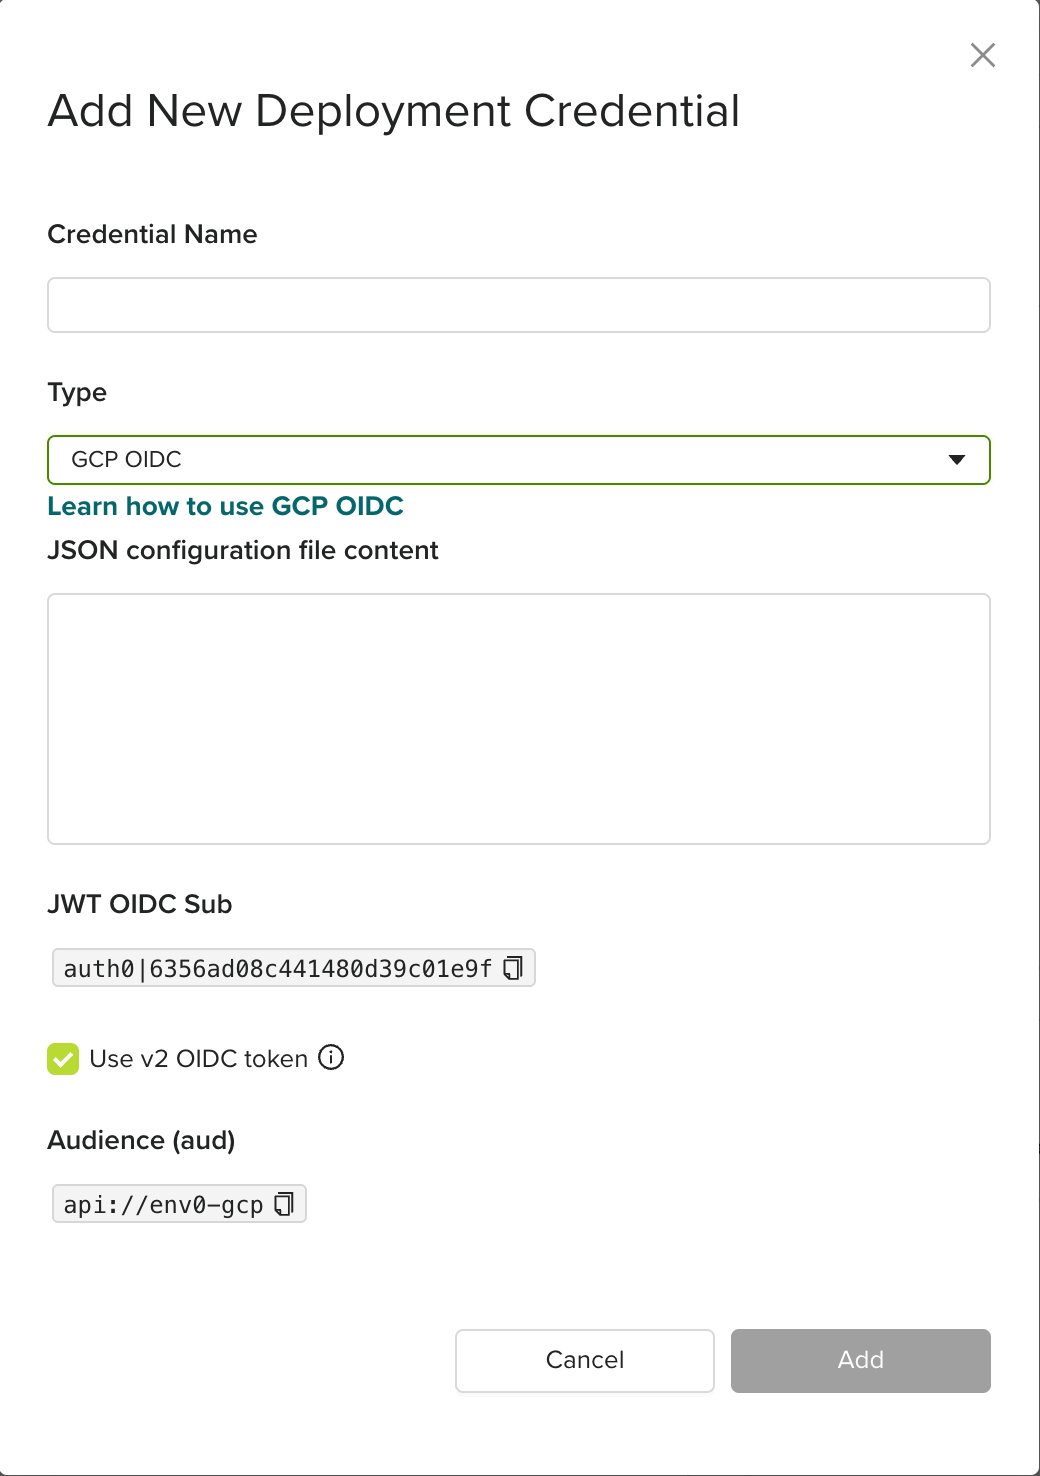
GCP OIDC credential with v2 token enabled
env0_credential_configuration.json in the deployment pod that will contain the configuration file content. To be able to use OIDC with GCP you will need to read that configuration file in your code. For example, using terraform, it will look like this:
Credential File PlacementThe file will be placed in the environment’s template path. The value is exposed by the ENV0_TEMPLATE_PATH variable.If no specific template path is set, the file will be placed in the directory defined by the variable: ENV0_ROOT_DIR.
Migrating an existing v1 credential
If you already authenticate to GCP with a v1 env zero OIDC credential, your Workload Identity provider’s allowed audiences containhttps://prod.env0.com. Because allowed audiences is a list, you can add the v2 audience alongside the old one and migrate without downtime:
- Add the v2 audience to the provider. In
IAM & Admin>Workload Identity Federation, open your env zero provider, edit it, and addapi://env0-gcptoAllowed audiences, keepinghttps://prod.env0.comfor now. - Enable v2 on the credential. Edit the GCP OIDC credential in env zero and check Use v2 OIDC token. The next deployment mints a token with
aud: api://env0-gcp. - Keep the old audience until everything else migrates. Leave
https://prod.env0.comin the allowed audiences until every other consumer of the shared audience has moved to v2. Remove it only once nothing depends on it.
Next steps
- Retrieve OIDC subject identifier - Find the subject identifier for your OIDC token.
- OIDC for AWS - Set up OIDC for AWS as an alternative cloud provider.
- OIDC for Vault - Authenticate with HashiCorp Vault using OIDC.